Quick Start From sign-up to your first live eBay listing.
Thanks for signing up with Easy TCG Lister — we built this to make listing cards as fast and painless as possible. This guide takes you from a blank dashboard to your first live eBay listing in six steps. Most people are publishing within a few minutes.
- Connect your eBay account
- Scan your first card
- Confirm the card
- Price it
- Set up your description template
- Publish
The eBay connection is the only part that takes a little setup — and we automate almost all of it. If anything ever needs a manual touch, the full eBay setup guide covers every case.
1Connect your eBay account
From your dashboard, click Connect eBay at the top — or open the account menu (bottom-left) and go to Store Connections → Connect eBay. We use eBay's secure sign-in, so your eBay password never touches our servers.
/static/help/quick-start/01-store-connections.png
Once connected, click Set up automatically in the eBay business policies section. This creates the three business policies eBay requires for any app to list on your behalf — right on your own eBay account:
- Payment
- Return
- Fulfillment (shipping)
/static/help/quick-start/02-set-up-automatically.png
If setup doesn't finish on its own
Automatic setup works for any eBay seller account that's fully activated. The one thing no app can do for you is finish eBay's own payment / seller activation — if that's the holdup, setup shows an Open eBay payments setup button. Finish that one step on eBay, come back, and click I've finished — continue setup; it picks up right where it left off.
In rare cases the Fulfillment (shipping) policy won't create automatically. If so, you can make two shipping profiles by hand on eBay — eBay Standard Envelope for cards $20 and under, and USPS Ground Advantage for everything else — then import them. The full steps are in the eBay setup guide.
/static/help/quick-start/03-ebay-business-policies.png
2Scan your first card
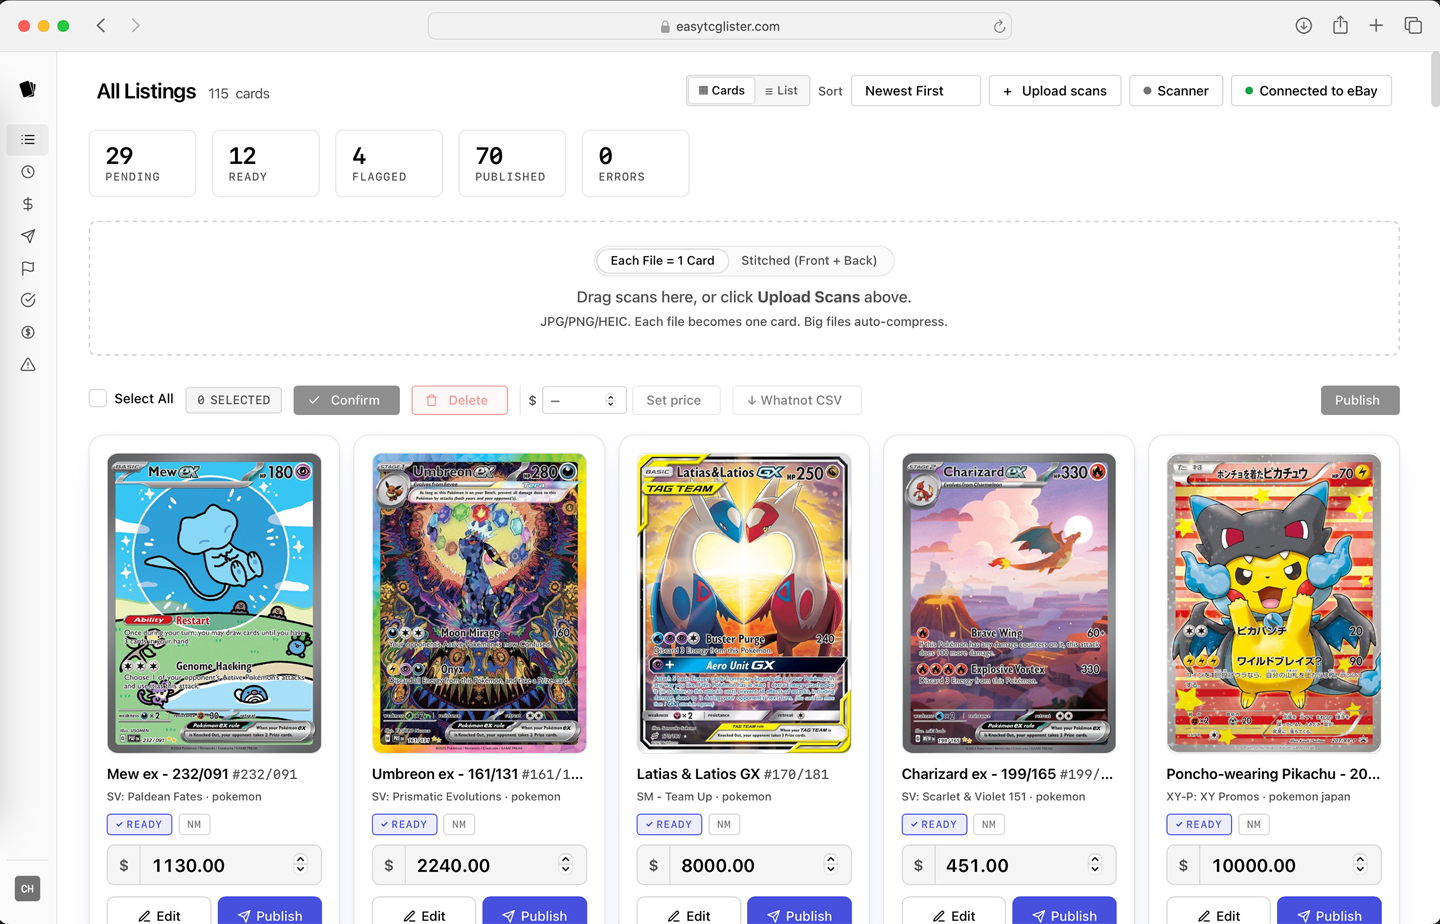
With eBay connected, you're ready to scan. There are three ways to get cards in:
- Desktop scanner — save scans to a folder, then drag them onto the Upload Scans zone on your dashboard. We read the card and ask you to confirm it.
- Desktop relay app — point it at a folder on your computer; every photo you drop in uploads and processes automatically. Best for bulk listers who just want to keep scanning. See the desktop scanner guide.
- iOS app — snap photos with your camera, or pick from your camera roll. Lighting and focus matter a lot here: our AI reads both the whole card and the small set/number text, so sharp, evenly-lit photos scan far more reliably.
3Confirm the card
Our system identifies the card and shows you what it found. Check the card and its variant, then either:
- hit Confirm to lock it in and jump straight to your next scan, or
- hit Price to go right to pricing this card.
/static/help/quick-start/04-confirm.png
Want the detail on confidence scores and fixing a misread? See Confirming cards.
4Price it
You can Auto Price the card or enter a price yourself. Auto Price is usually spot-on — but it can be off when a card has several variants that share the same number. A One Piece promo, for example, might have one version that sells for $5 and another that sells for $1,500.
To help you make the call, we show active eBay listings and recently sold comps right on the pricing screen — real market data, side by side, so you can use your best judgement.
There's also a minimum price. If you list a lot of $1–$3 cards, a $1 sale might not cover shipping or be worth your time. Set a floor — it defaults to $3 — and we'll never list a card below it.
/static/help/quick-start/05-pricing.png
More on where prices come from and why a card gets flagged: Pricing & flagged listings.
5Set up your description template
Each store has its own description template that gets filled in automatically on every listing. It's where you put anything you want on all of your listings — your store info, your shipping process, return notes — and we merge in each card's specific details as it lists. Set it once and it carries forward to every card you publish.
/static/help/quick-start/06-description-template.png
6Publish
Happy with the card, the price, and your description? Hit Publish and the listing goes live on eBay. We recommend opening it on eBay once to confirm it looks exactly the way you want — then you're off.
/static/help/quick-start/07-publish.png
That's the whole flow
Do it one card at a time, or select several and use bulk confirm / bulk publish to rip through a whole batch at once. The more you scan, the faster it gets.
Stuck on anything? Email support@easytcglister.com — we're happy to help.